DIY Smart Plant Monitoring System
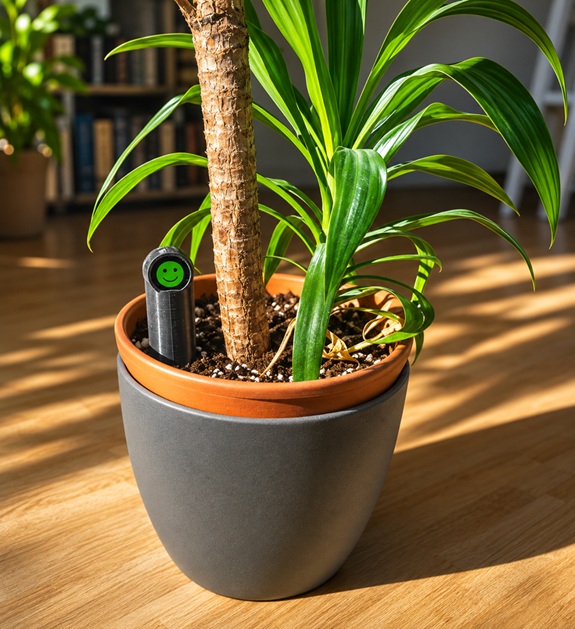
Designing and building a battery-powered smart plant sensor using an ESP32-C3, custom PCB, MQTT communication, and a Flutter Android application.
Give Your Plants a Voice!
Keeping houseplants healthy sounds simple, but maintaining the right soil moisture level can be surprisingly challenging. Different plants have different watering requirements, and both overwatering and underwatering can cause serious problems.
Instead of relying on fixed watering schedules or manually checking the soil, I wanted to develop a compact, battery-powered monitoring system that could measure soil moisture, provide immediate visual feedback, and notify me when a plant needs attention.
However, this project quickly became much more than a simple moisture sensor.
My goal was to design and build a complete embedded IoT system from scratch, combining custom electronics, PCB design, embedded software, wireless communication, and a dedicated Android application.
What Can the System Do?
The smart plant monitoring system combines several useful features:
- Soil Moisture Monitoring: Measures soil moisture and evaluates whether the plant needs water.
- Visual Status Display: A display shows the plant’s condition using intuitive visual indicators.
- Battery-Powered Operation: Deep-sleep functionality reduces the energy consumption of the ESP32-C3.
- Audible Alerts: An integrated buzzer provides warnings when the soil becomes too dry or too wet.
- Wi-Fi & MQTT: Wireless communication enables integration with a Raspberry Pi-based MQTT infrastructure.
- Android Application: A custom Flutter app provides an interface for monitoring and configuring the system.
- Sensor Calibration: The moisture sensor can be calibrated to improve measurement interpretation.
- Notification System: Firebase-based notifications are being integrated to inform users about important changes.
What’s Inside?
The system is built around an ESP32-C3 SuperMini microcontroller, which provides the processing power and wireless connectivity required for the project.
A soil moisture sensor measures the condition of the soil, while a compact GC9A01 circular TFT display provides immediate feedback.
The electronics are integrated into a custom-designed PCB, developed using KiCad. The Case was designed and 3D printed.
A Raspberry Pi running an MQTT broker acts as part of the communication infrastructure, while a Flutter-based Android application provides the mobile user interface.
The combination of these components creates a flexible platform that can be expanded and improved over time.
Build It Yourself – Step by Step
This project is documented in eight chapters, guiding you from the initial concept to the final system.
1. Introduction & Overview
Discover the motivation behind the project, the main design requirements, and how the different components work together.
2. Hardware Design
Explore the ESP32-C3, moisture sensor, display, buzzer, battery monitoring circuit, and other electronic components.
Learn why each component was selected and how the hardware is connected.
3. PCB Design with KiCad
Follow the development of the custom printed circuit board, from the schematic to PCB layout and assembly.
4. ESP32 Firmware
Learn how the firmware reads sensor values, controls the display, handles calibration, manages alarms, and reduces power consumption.
5. Raspberry Pi & MQTT
Set up the communication infrastructure and learn how the ESP32-C3 exchanges information using MQTT.
6. Flutter Android App
Explore the development of the Android application, including its user interface, sensor monitoring, and configuration features.
7. Notifications System
Learn how the notification system is designed and how Firebase can be used to deliver alerts to an Android device.
8. Testing & Results
Take a closer look at the project’s performance, power consumption, practical testing, and potential future improvements.
Who Is This Project For?
This tutorial series is intended for makers, electronics enthusiasts, students, and anyone interested in developing their own IoT devices.
Some basic knowledge of electronics and programming is helpful, but the individual steps will be explained in a way that makes the project approachable.
Rather than simply providing a finished design, I want to share the complete development process, including the challenges, experiments, and lessons learned along the way.
Let’s Get Started!
Ready to build your own smart plant monitoring system?
Start with Chapter 1 – Introduction & Overview and follow the project step by step.
Happy making!